
How to Work with Zapier
Tired of re-entering data from a spreadsheet or report into your Actual values on your Rhythm KPIs every week? This integration can do the data entry work for you.
When you make a Zap (which is Zapier's term for workflow), you will choose the source for the data (your spreadsheet, for example). Then, you will link a specific Rhythm goal (KPI, Priority) to Zapier. You can map up the right cells in the spreadsheet to update your Rhythm KPI and choose how frequently your data is pushed into Rhythm. You can send the Projected, Actual, AND Variance data, Success Criteria, and even a Comment into Rhythm.
Before taking the steps below, you should check the Zapier website to be sure that the source of your data connects with Zapier. If you don't see the application you are looking for, you may need a developer to build a custom API Integration (see our custom API integration help documentation).
Configure Rhythm
The first step is to contact us (help@rhythmsystems.com) to turn on API access for your Company. We'll set you up on the backend, and when you click on your name in the top left corner of the screen, you'll see an option for "API Admin."
Configure Zapier
Log in to your existing account or create an account with Zapier.
Set Up a Trigger App
To get started, click Make a Zap at the top of the Zapier dashboard.
You’ll be prompted to choose a trigger app. Search for the source of your data (like Google Sheets, for example. Here's a template with an example of how to set up a Google Sheet if you want one Zap to update multiple items in Rhythm.)
Next, you'll be asked to select a trigger, like when a row is added or modified in your Google Sheet. Click Save + Continue.
Then, you'll be asked to login to the trigger app to give permission to pull in the data. Once you've connected Zapier with your data source, you can choose which data to pull (for example, which Spreadsheet, Worksheet, and Column contains the information you want Zapier to pull into Rhythm for you.)
Connect to Rhythm
Next, you'll choose your Action App - in this case, Rhythm!
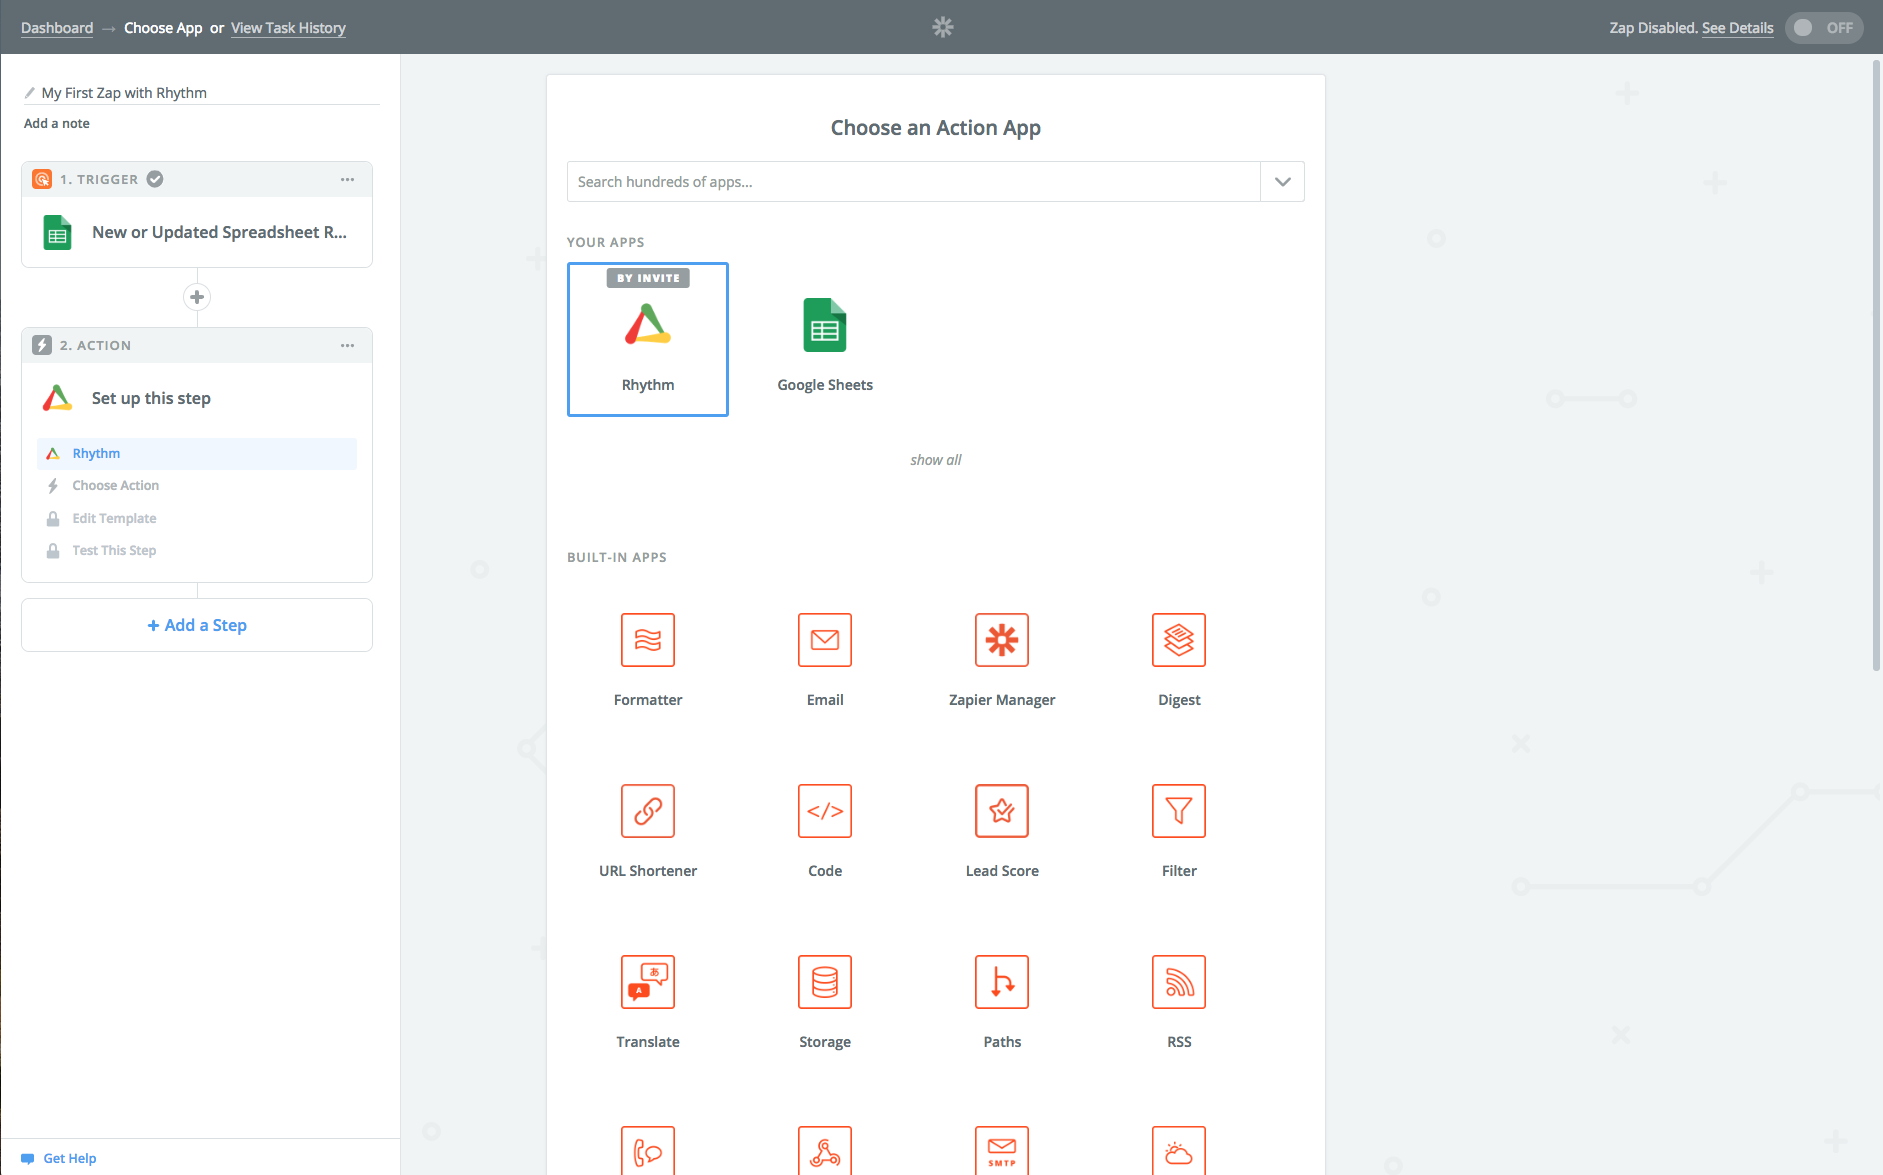
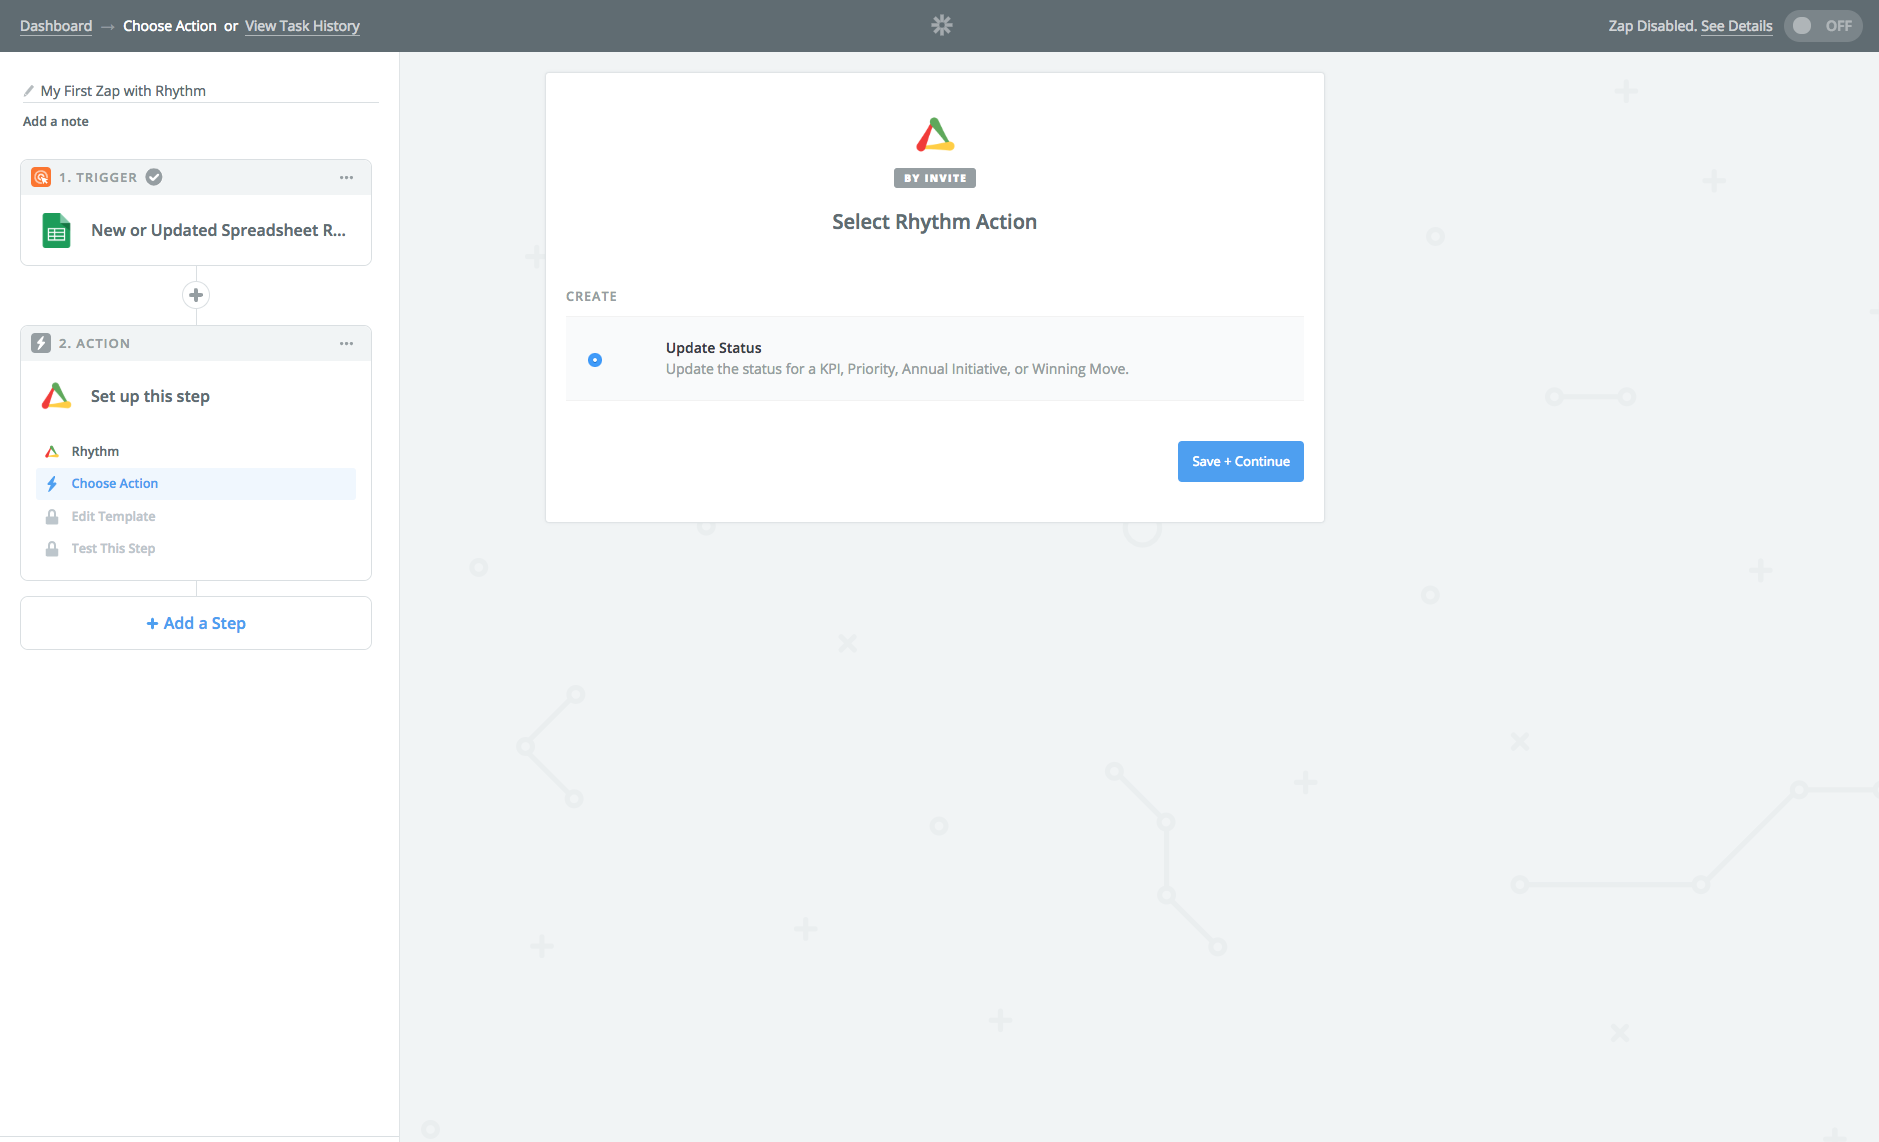
For now, Rhythm only supports one type of Action, so you can select Update Status and hit Save + Continue.
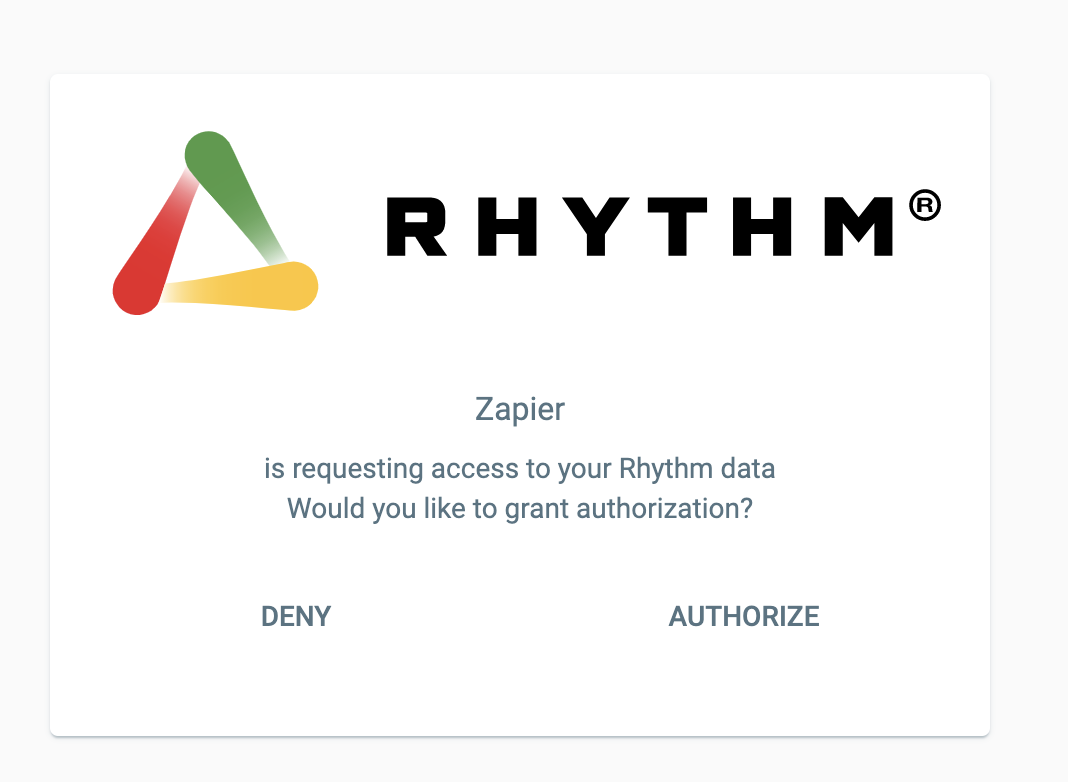
Next, you need to connect your Rhythm account; you'll be asked to login with your Rhythm username and password and give Zapier permission to update your account.
Next, head back into Rhythm and find the goal you want the Zap to update. Open the KPI or Priority detail, and click on the More Actions button:
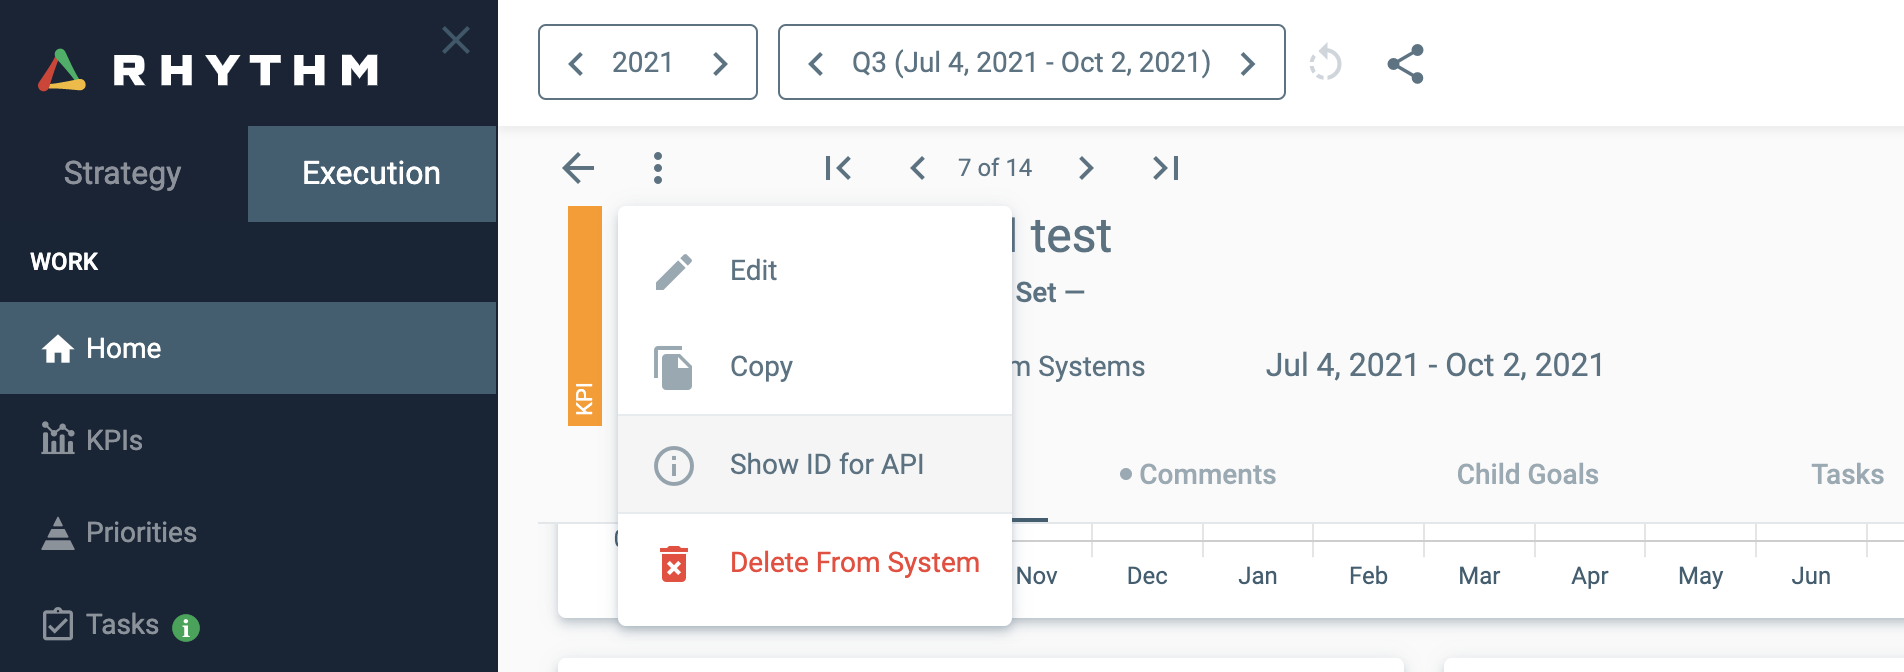
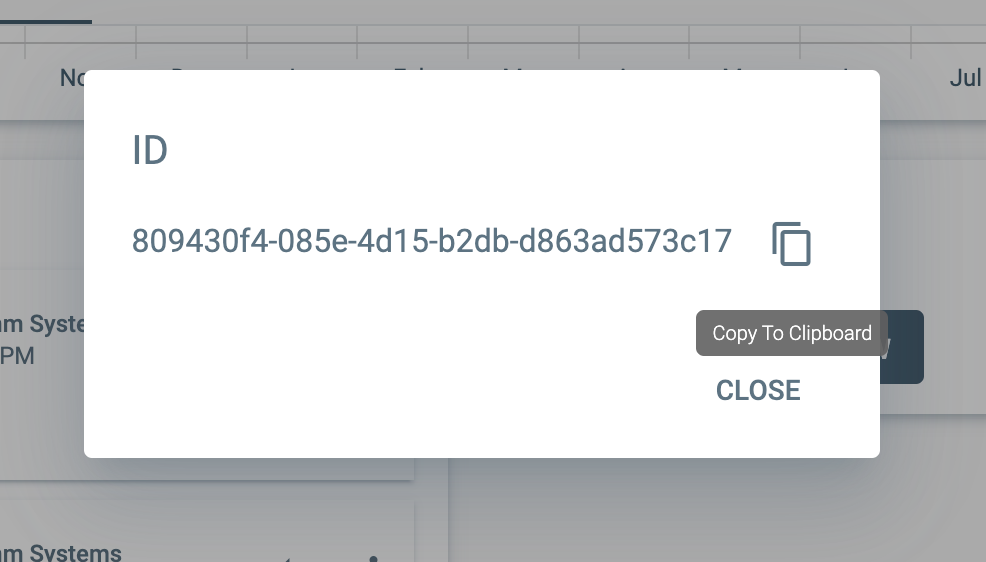
Choose "Show ID for API..." and hit the button to copy the ID to your clipboard:
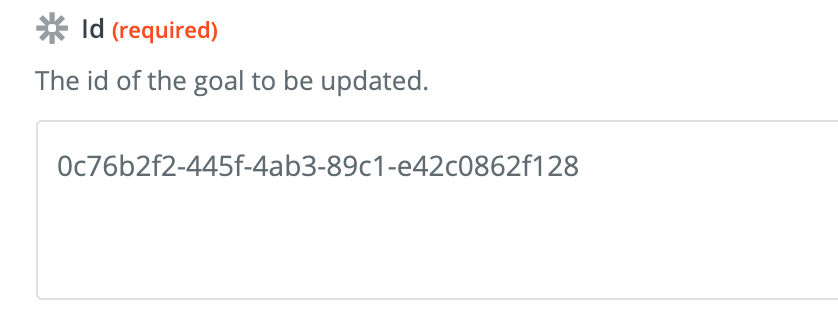
Head back over to Zapier, and paste the goal ID:
Note: If you leave the Year, Quarter, Week, and Date fields blank, Rhythm will determine which week to update. If you pass Year, Quarter, and Week fields they must all be passed together. If you omit any of the three Rhythm will determine which week to update.
TIP: If you are updating multiple goals at once, you can download a report to pull all the relevant Goal IDs into one file. Go to the Reports screen, and choose the Goals List Export. You can choose to export all the Goal IDs for KPIs, Winning Moves, Annual Priorities, or Quarter Priorities. The .CSV file contains the Goal ID, the Name, the Team, the Owner, and the Start and End Dates for the items you select.